From Visit to Signed Note: A Chartnote Walkthrough
On this page
- The short version
- Before your first visit: a 10-minute setup
- Create your account
- Install the Chrome extension
- Pick or build a template
- Add a few snippets
- Step 1: Get consent
- Step 2: Start a visit
- Choose your settings (optional, but worth it)
- Step 3: Record the visit
- Step 4: Generate the note
- Step 5: Review and refine
- Step 6: Send the note to your EHR
- Option A: Intelligent Mapping (one click)
- Option B: Chartnote Companion (any web-based EHR)
- Option C: Copy or download
- Step 7: Sign in your EHR
- After the visit
- Other ways to start a note
- So how long does it take?
- Frequently asked questions
- Does Chartnote sign the note for me?
- Which EHRs does Chartnote work with?
- Can I use Chartnote for telehealth visits?
- What if I get interrupted mid-visit?
- Is there a free plan?
- See it on your own visits
Most AI scribe demos show the magic moment: someone talks, and a note appears. But you don’t live in the demo. You live in the clinic, where the note still has to be checked, moved into your EHR, and signed before the next patient sits down.
This walkthrough follows a real visit through Chartnote from start to finish: setup, consent, recording, generating, reviewing, and getting the note into your EHR for signature. Every step is based on Chartnote’s public product pages and help center.
A note on versions: This walkthrough reflects Chartnote 3.0, which goes live on November 1, 2026. With 3.0, the web app moves to app.chartnote.com, and older app links redirect there automatically (Get ready for Chartnote 3.0).
The short version
Chartnote’s homepage sums up the flow in three steps:
- Record: “Capture the patient encounter using your computer or mobile device.”
- Generate: “AI Scribe converts the conversation into a structured clinical note.”
- Review & finalize: “Edit, refine, and transfer into your EHR in seconds.”
The rest of this post fills in the details.
Before your first visit: a 10-minute setup
Create your account
Go to chartnote.com/welcome and sign up with email or Google. The Basic plan is free, with no credit card required. You’ll verify your email, complete your profile, and choose whether to set up multi-factor authentication. If you plan to record on your phone, download the iOS or Android app (Get started with Chartnote).
Install the Chrome extension
The Chartnote Chrome extension is free on every plan. It’s how notes get into your web-based EHR without copying and pasting. Pin it to your toolbar.
Pick or build a template
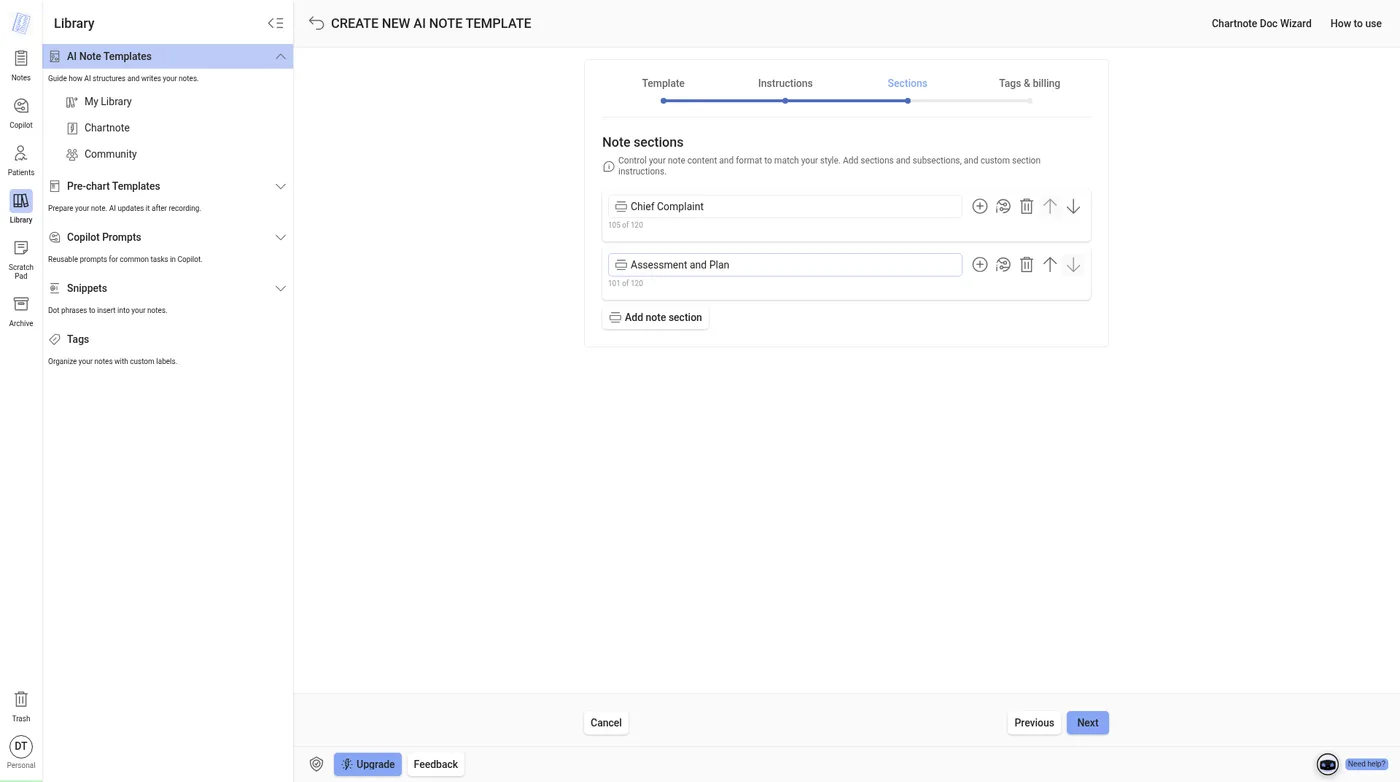
Templates control how your note is organized. You can start with one of Chartnote’s templates or one from the community library, or build your own with Custom AI Note Templates. Set your sections, add instructions, and choose narrative, concise, or bullet style. In 3.0, your own templates appear first in the list.
Add a few snippets
Snippets are reusable text, such as your normal exam, counseling language, or return precautions. You can insert them in Chartnote or expand them inside your EHR by typing @ and the abbreviation.
Step 1: Get consent
Before recording, tell the patient you use an AI scribe and ask whether that’s OK. Chartnote’s consent guide recommends a short verbal script, a posted notice, and a one-line note in the chart. For example: “Discussed the use of audio recording for clinical note transcription with the patient, who gave verbal consent to proceed.” There’s also a bilingual sample consent form.
Step 2: Start a visit
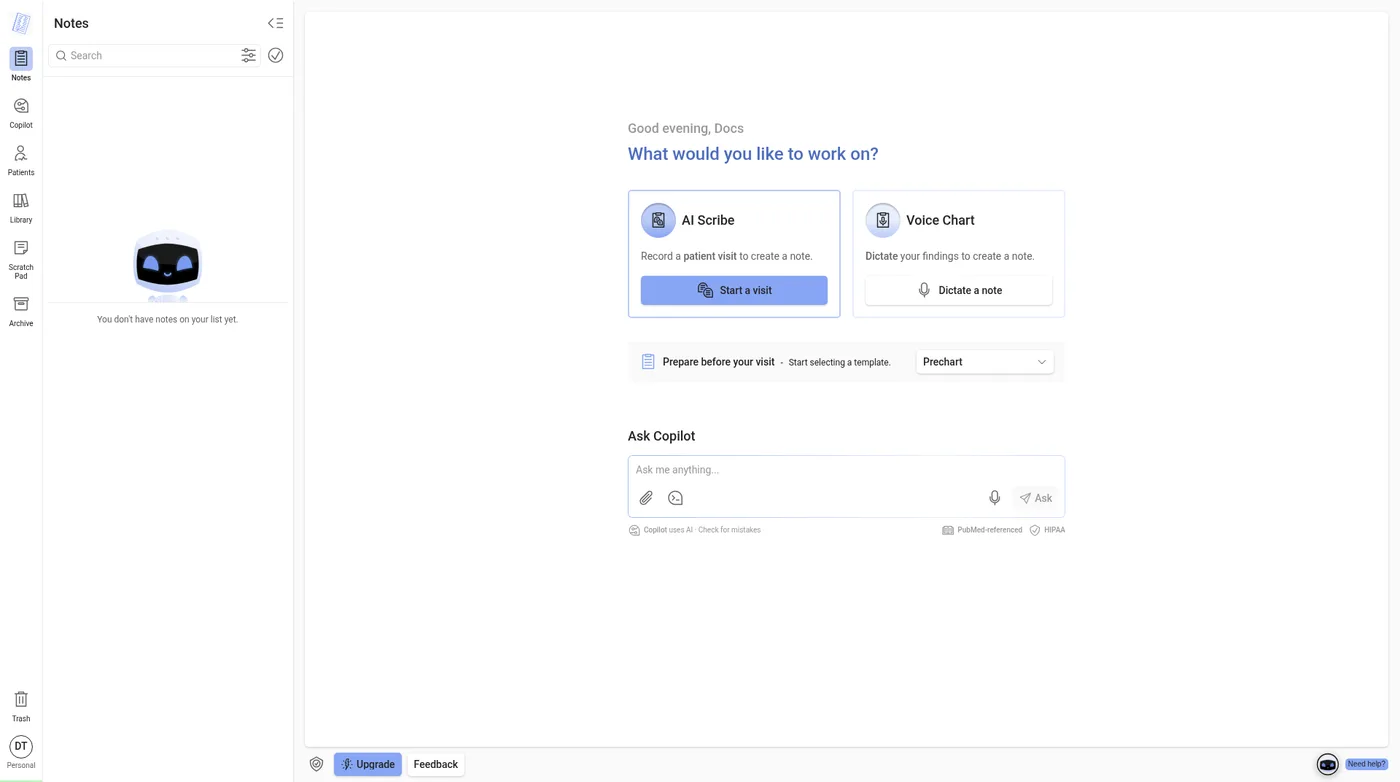
On Home, Chartnote asks, “What would you like to work on?” Choose AI Scribe → Start a visit. The draft is saved right away and syncs across your devices, so you can start on your phone and finish on your computer.
Choose your settings (optional, but worth it)
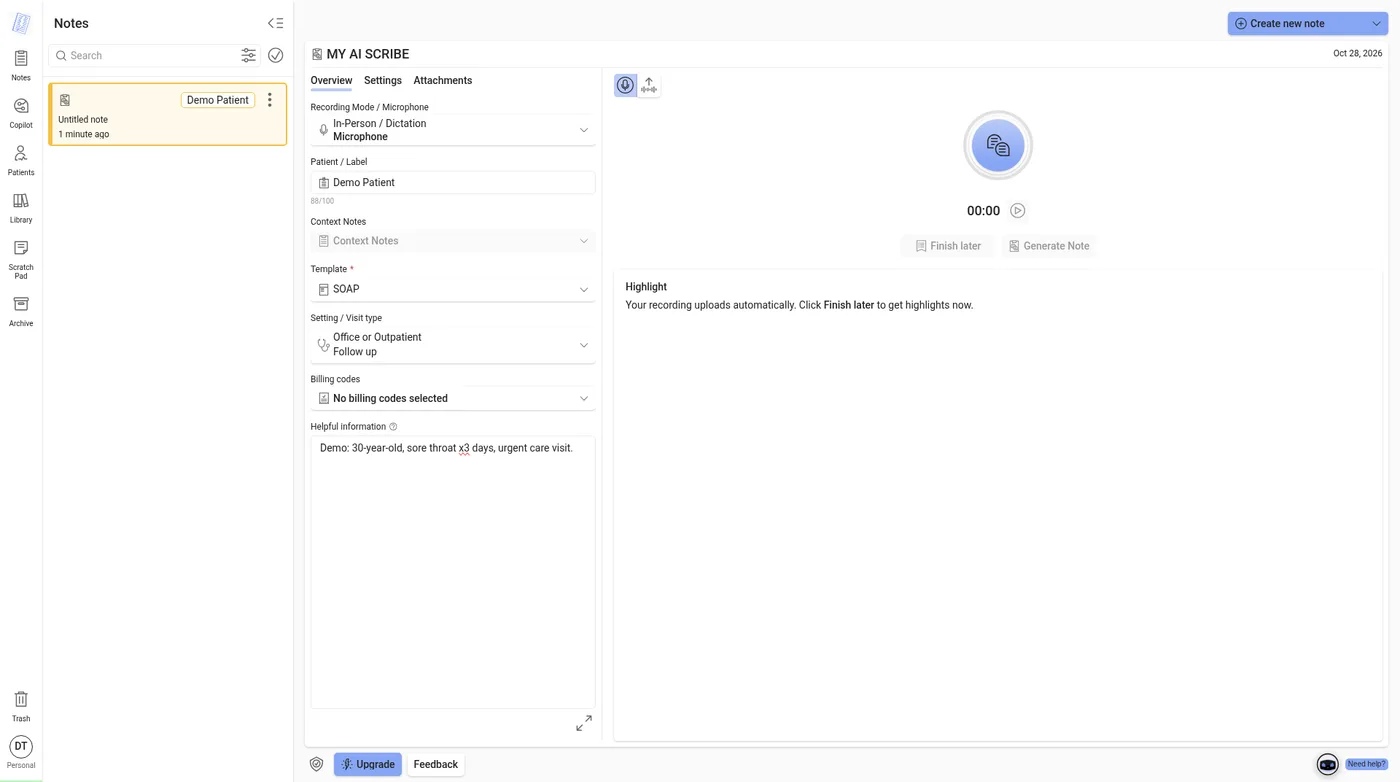
The draft opens on the Overview tab, with more options under Settings and Attachments (Record patient visits with AI Scribe):
- Recording mode: the setup screen shows In-Person / Dictation and Microphone. Telehealth, for video visits, captures your screen’s audio and requires Chrome.
- Patient or label, plus your template.
- Context Notes: earlier finished notes for the same patient.
- Attachments: PDFs such as outside records or referral letters.
- Helpful information: details that won’t be said out loud. Type @ to insert a snippet.
- Voice language (including Automatic detection), note language, and note length.
- Setting, visit type, and billing codes (CPT and ICD-10).
A new draft remembers your template and languages, but not the patient.
Step 3: Record the visit
Press the record button and talk to your patient normally. Before you start, the timer reads 00:00.
- The visit screen says your recording uploads automatically. Finish later gets highlights now, so you can leave and come back.
- Short visits are fine. There’s no 30-second minimum.
- Interrupted? Click Finish later to save a free Highlight, a short summary of the visit so far, then resume when you’re ready, on any device.
A habit that helps: say exam findings and your plan out loud (“Lungs are clear bilaterally. We’ll start lisinopril 10 milligrams daily and recheck in four weeks.”). It helps the patient, and it gives the AI exactly what it needs.
Step 4: Generate the note
Click Generate Note. The note card moves from Transcribing to Generating to Ready. Chartnote’s homepage describes this as generating “a structured SOAP note in seconds.”
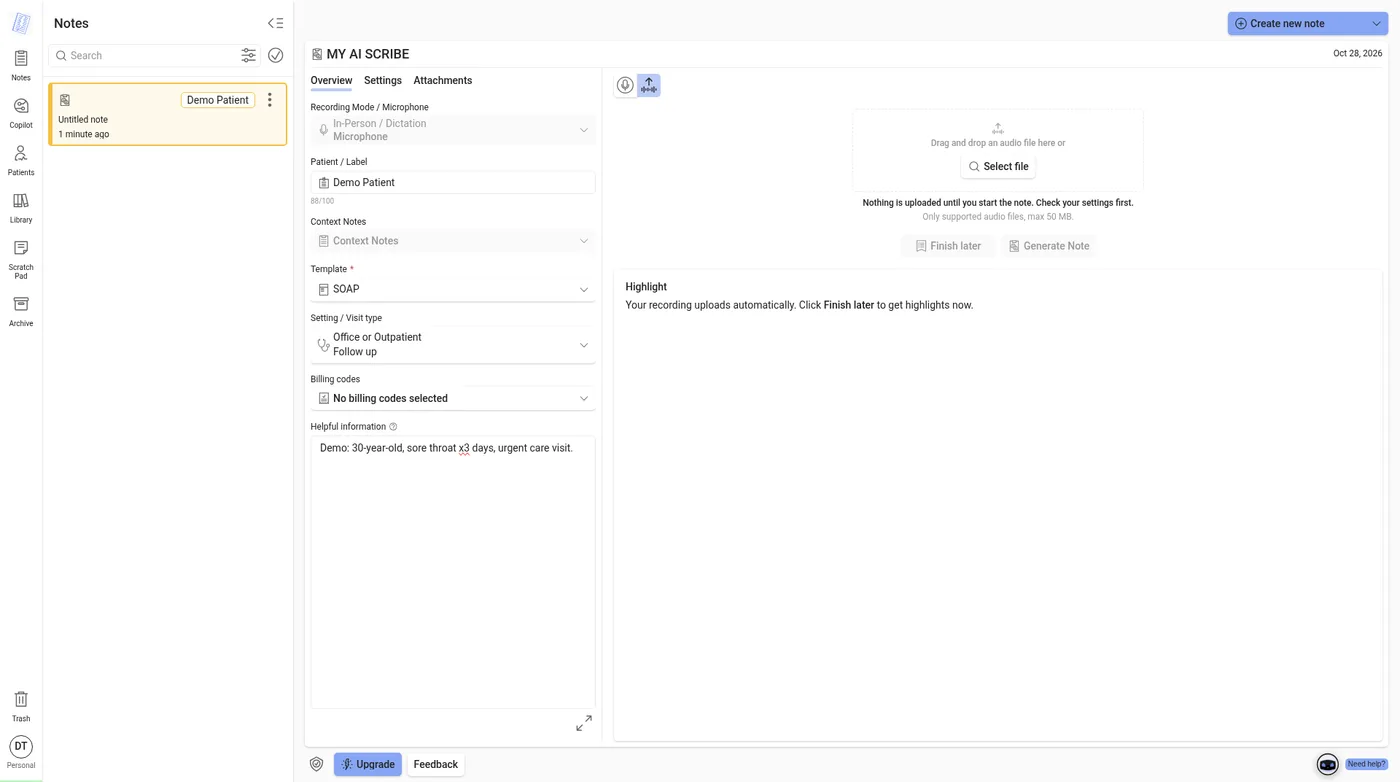
You can also start from an audio file. That view of the visit screen is an upload step: drag a file in or choose Select file, then Generate Note. Nothing is uploaded until you start the note. It is not a live recording in progress.
Each encounter uses one credit the first time the note is generated. If generation fails, retrying the same encounter is free.
Want to see this live with your own template? Book a 20-minute demo.
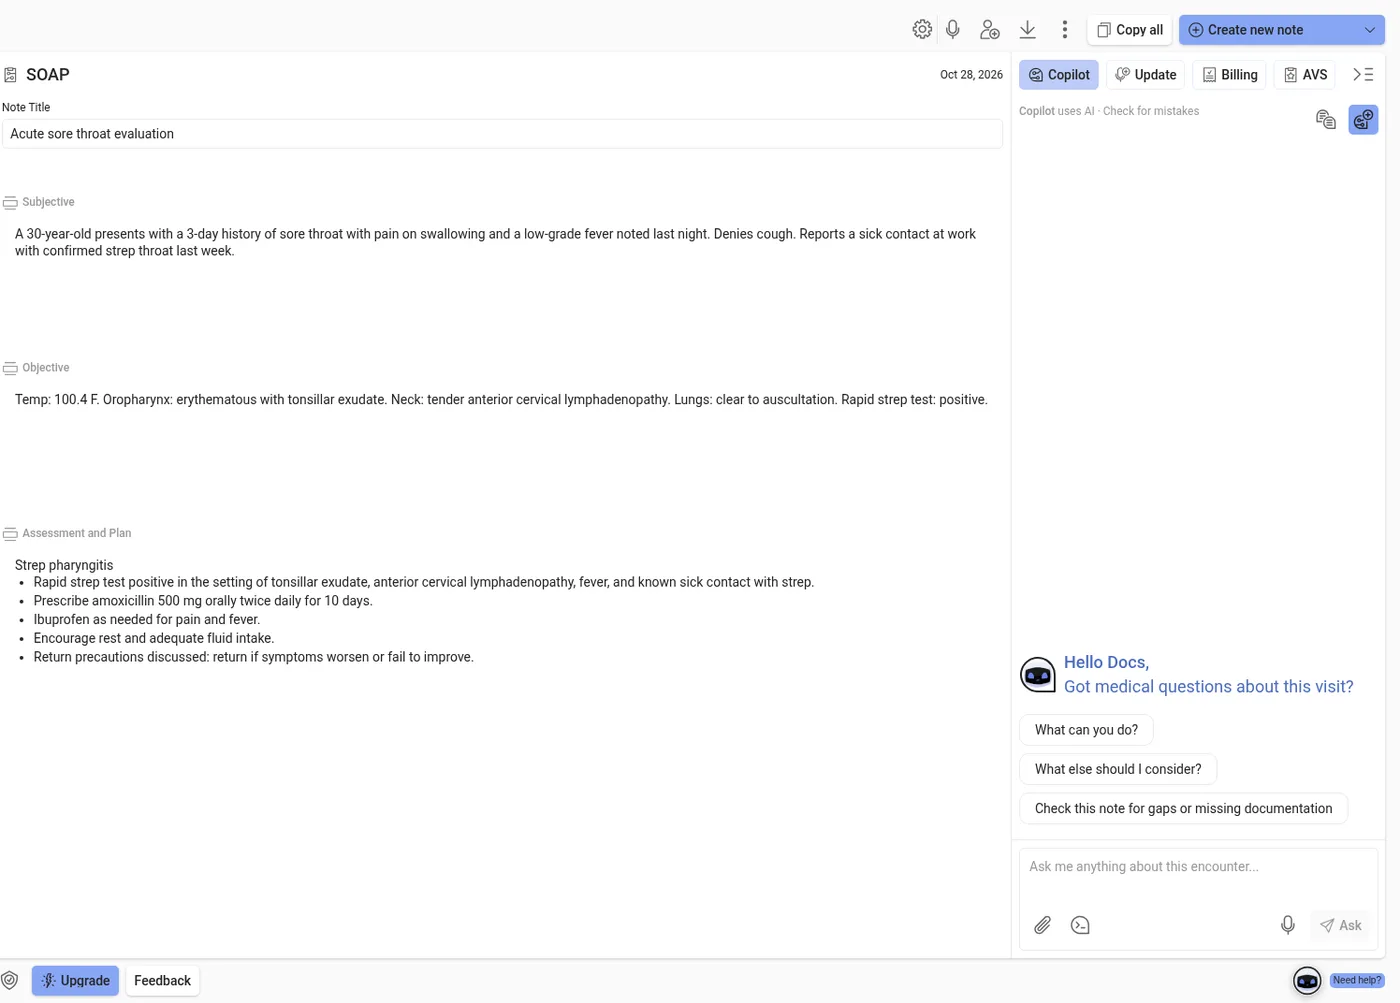
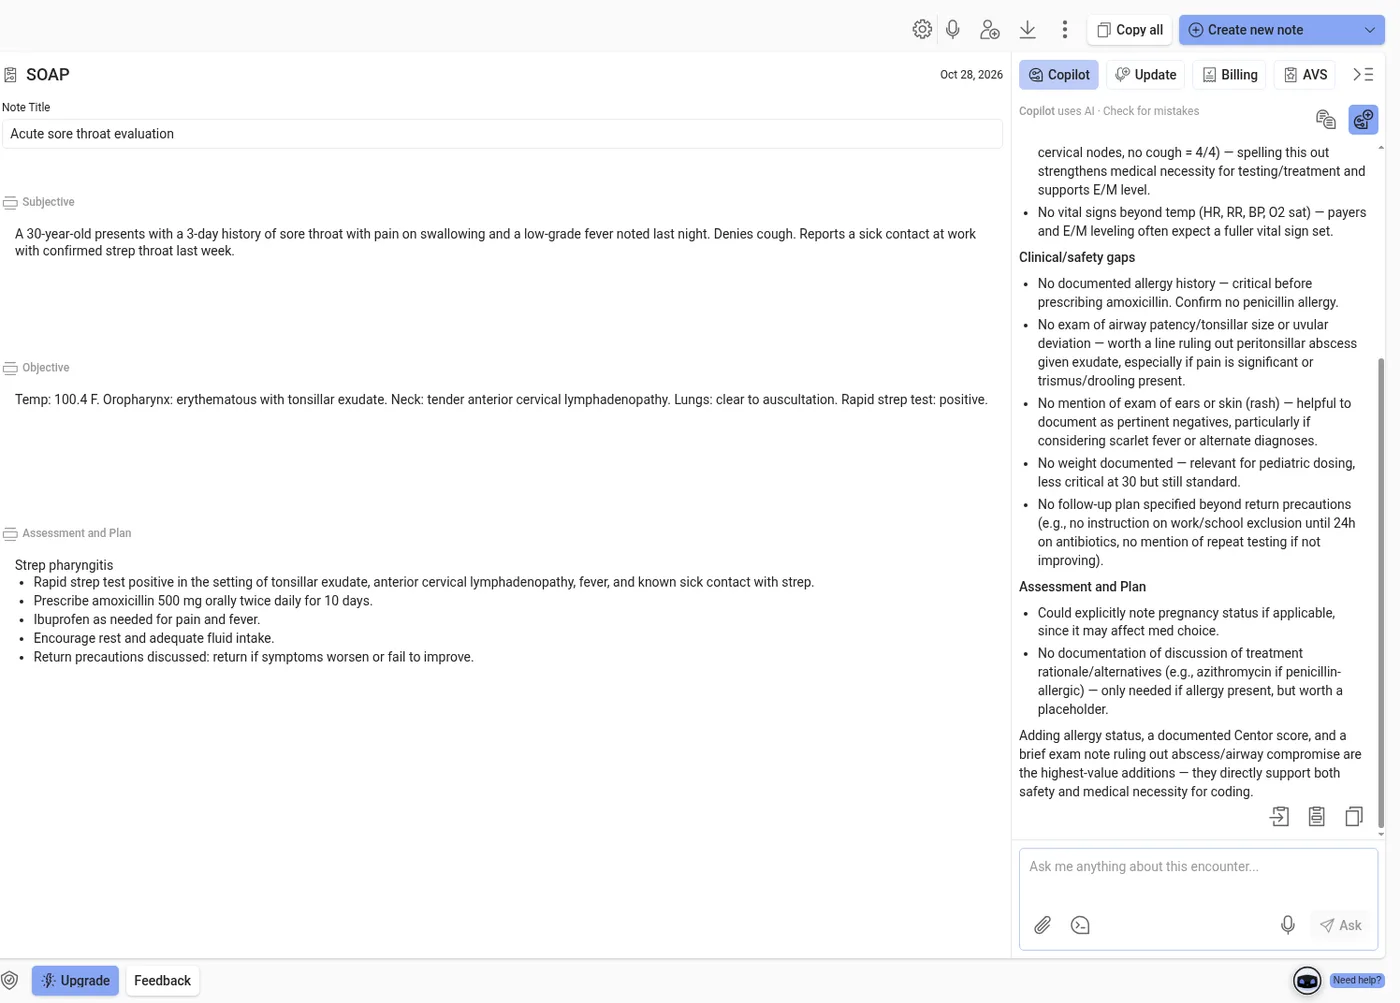
Step 5: Review and refine
This step matters most. Chartnote’s privacy and security page says it directly: “AI output is always reviewed and approved by the clinician.”
Open the note and read it the way you’d read a resident’s draft. Then use whichever tools you need:
- Edit directly in any section.
- Dictate changes with Voice Chart. You can dictate into any section and edit by voice.
- Switch templates if you picked the wrong one, using Update template.
- Check billing suggestions for ICD-10, CPT, and E/M codes, which Chartnote can include with the note.
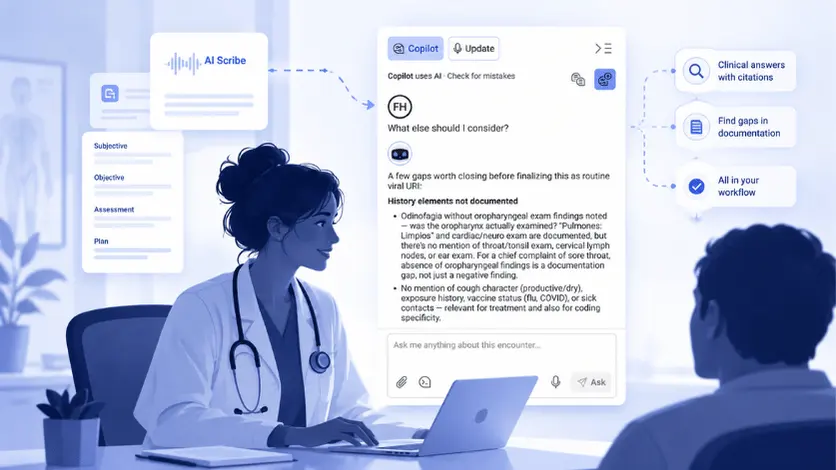
- Ask Copilot to draft a referral letter, patient message, or after-visit summary from the note.
Step 6: Send the note to your EHR
When the note is ready, you have three ways to get it into your chart.
Option A: Intelligent Mapping (one click)
If your EHR is supported, Intelligent Mapping lets you match Chartnote sections to your EHR’s fields once. After that, the Chrome extension transfers the whole note into the right fields with one click. The help center lists completed mappings for EHRs including Practice Fusion, Elation, eClinicalWorks, athenahealth, OpenEMR, ModMed, Charm, Tebra, Office Ally, and others.
Option B: Chartnote Companion (any web-based EHR)
If your EHR isn’t mapped yet, Chartnote Companion pins the finished note next to your EHR. You can insert one section at a time by clicking it, right-clicking, or typing a section shortcut and pressing Tab.
Option C: Copy or download
You can always copy the note or download it as a PDF.
Step 7: Sign in your EHR
Chartnote is “a documentation tool, not an electronic health record,” as its privacy page puts it. Your EHR remains the official record. After the note is in your chart, do your final check and sign it there, the same way you always have.
After the visit
- Patient instructions: In your EHR, select text, right-click, and choose Generate After Visit Summary from the Chrome extension.
- Patient messages: The extension’s Copilot can help draft replies.
- Retention: Notes and recordings can be set to delete automatically after 1 to 30 days. If you use a retention policy, notes it deletes skip the Trash and can’t be recovered.
Other ways to start a note
AI Scribe isn’t the only starting point:
- Voice Chart (Dictate a note): Dictate a summary after the visit and get a structured note. Useful when recording the visit isn’t appropriate.
- Scratch Pad: Paste or dictate clinical information, then convert it into a note using your template.
- Mobile app: Record on your phone, including offline. Processing the recording into a note needs an internet connection.
So how long does it take?
That depends mostly on you. Chartnote generates the note in seconds, and Intelligent Mapping transfers it in one click. Your review is the variable, and it gets faster as your template starts to match how you think.
Frequently asked questions
Does Chartnote sign the note for me?
No. Chartnote drafts the note, and you review and approve it. Signing happens in your EHR, which remains the official record.
Which EHRs does Chartnote work with?
Chartnote works alongside web-based EHRs through its Chrome extension. Some EHRs support one-click Intelligent Mapping. For others, Chartnote Companion lets you insert one section at a time. See the current integration list.
Can I use Chartnote for telehealth visits?
Yes. Choose Telehealth recording mode in Chrome to capture audio from platforms such as Zoom, Microsoft Teams, Doximity, and Google Meet (recording modes).
What if I get interrupted mid-visit?
Click Finish later. Chartnote saves a free Highlight of the visit so far, and you can resume recording or generate the note later, on any device.
Is there a free plan?
Yes. The Basic plan is free and includes 15 AI Scribe notes a month, with no credit card required. Paid plans start at $39.99/month (pricing).
See it on your own visits
A walkthrough only goes so far. The real test is your template, your EHR, and your patients.
Book a demo and we’ll run this flow live with your EHR, or start free and try it on your next visit.